Key Takeaway
The definitive boa constrictor feeding chart. Exact prey sizes in grams, feeding schedules by age and sex, and expert guidance on avoiding the power feeding trap that shortens boa lives.
Table of Contents
- 1. Understanding Boa Constrictor Metabolism
- 2. The Master Boa Constrictor Feeding Chart
- Hatchlings (0–6 Months)
- Juveniles (6 Months – 18 Months)
- Sub-Adults (18 Months – 4 Years)
- Adult Boas (4+ Years)
- 3. The Power Feeding Problem: A Detailed Look
- Hepatic Lipidosis (Fatty Liver Disease)
- Cardiovascular Disease
- Reproductive Failure
- Regurgitation
- 4. Prey Type Progression for Boa Constrictors
- Phase 1: Mice (Hatchling to 3–4 months)
- Phase 2: Mouse to Rat Transition (3–6 months)
- Phase 3: Rats as Staple (6 months onward)
- Phase 4: Rabbit Consideration (Very Large Adult Females, Optional)
- 5. Body Condition Scoring for Boa Constrictors
- Underweight (BCS 1–2)
- Ideal (BCS 3)
- Overweight (BCS 4)
- Obese (BCS 5)
- 6. Temperature Requirements for Optimal Digestion
- 7. Dealing with Feeding Refusals
- Seasonal Refusal (October–February)
- Pre-Shed Refusal
- Post-Handling Refusal
- Prey Size Refusal
- Persistent Refusal (4+ weeks without seasonal cause)
- 8. Thawing Large Prey Items Correctly
- 9. Buying Quality Frozen Feeders for Boa Constrictors
- Frequently Asked Questions
- Conclusion
Boa constrictors (Boa constrictor) are among the most magnificent snakes in the reptile hobby — but they are also among the most frequently over-fed. The instinct to feed a beautiful, growing snake as much as possible as fast as possible is understandable, but it is one of the leading causes of premature death in captive boas. A boa that could live 25–30 years with proper feeding is routinely shortened to 12–18 years by power feeding and inappropriate prey sizing.
This guide provides the most precise, detailed boa constrictor feeding chart available — organized by age, sex, prey type, and prey weight in grams. It is designed as the definitive reference for both new boa keepers and experienced hobbyists who want to ensure they're feeding their animals correctly for the long term.
At Loxahatchee Rodents, we have worked with boa constrictors for over 25 years, and Bill Galloway's experience as an Assistant Curator at Palm Beach Zoo included managing large constrictors in a zoological setting. The guidance in this article reflects both practical field experience and current exotic animal nutritional science.
1. Understanding Boa Constrictor Metabolism
Before diving into the charts, it's essential to understand the physiological basis for boa feeding frequency. Boa constrictors are intermittent feeders — animals whose digestive systems are designed to process large, infrequent meals rather than frequent small ones.
When a boa swallows a prey item, their entire digestive system — which is largely dormant between meals — "boots up" in a process called specific dynamic action (SDA). Organs literally increase in mass as the digestive system ramps up to process the meal. The intestines increase in mass by up to 40%, the liver enzymes dramatically up-regulate, and heart rate increases.
This process takes 5–7 days in optimal conditions. Feeding a boa again before the previous meal is fully digested and the digestive system has returned to its resting state is what causes the cascade of health problems associated with power feeding. The liver, in particular, cannot process excess dietary protein and fat quickly enough, leading to fat accumulation in hepatic tissue — hepatic lipidosis — which is progressive and fatal.
Understanding this helps explain why the chart below looks "slow" compared to what you might see recommended in online forums: it is based on the boa's biology, not human impatience.
2. The Master Boa Constrictor Feeding Chart
Hatchlings (0–6 Months)
| Age | Approximate Length | Approximate Weight | Recommended Prey | Prey Weight | Frequency |
|---|---|---|---|---|---|
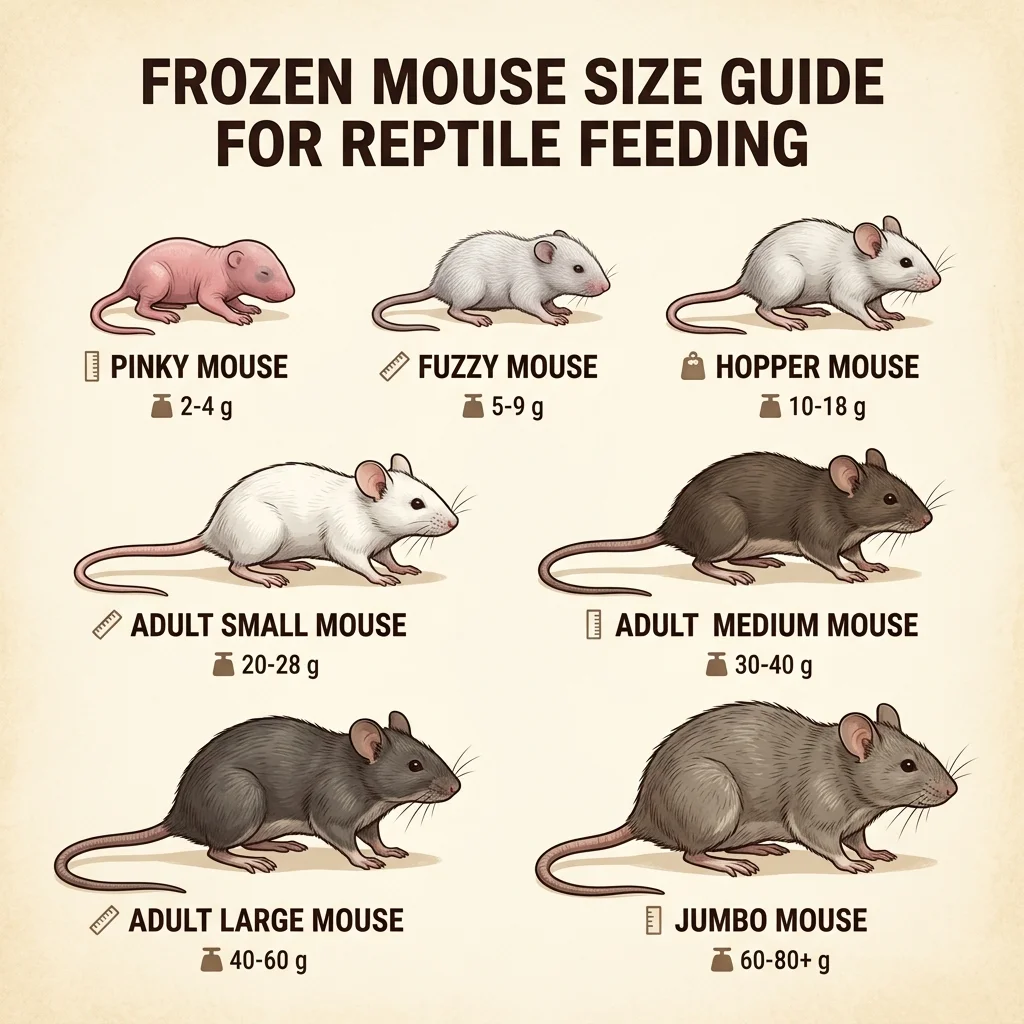
| 0–1 month | 18–22 inches | 60–120g | Hopper Mouse or Rat Pinky | 15–25g | Every 7–10 days |
| 1–3 months | 22–28 inches | 120–250g | Adult Small Mouse or Rat Fuzzy | 25–40g | Every 7–10 days |
| 3–6 months | 28–36 inches | 250–500g | Adult Medium Mouse or Rat Pup | 40–60g | Every 10 days |
Notes for hatchlings:
- First feeding should be offered 7–10 days after birth. Many hatchlings have residual yolk reserves and will not feed immediately.
- Some boa hatchlings are reluctant feeders. See Section 7 for transition techniques if your hatchling refuses.
- Use feeding tongs at all feeding sessions — never use your hands to offer prey to a boa.
Juveniles (6 Months – 18 Months)
| Age | Approximate Length | Approximate Weight | Recommended Prey | Prey Weight | Frequency |
|---|---|---|---|---|---|
| 6–9 months | 3.0–3.5 feet | 500g–800g | Rat Pup to Weanling Rat | 30–50g | Every 10–14 days |
| 9–12 months | 3.5–4.0 feet | 800g–1.2kg | Weanling Rat to Small Rat | 50–80g | Every 10–14 days |
| 12–18 months | 4.0–5.0 feet | 1.2kg–2.0kg | Small Rat | 80–100g | Every 14 days |
Notes for juveniles:
- This is the most critical period to establish correct feeding habits. The growth rate at this stage is rapid enough that it can be tempting to increase frequency. Resist.
- Monitor body condition monthly with a digital scale. A juvenile boa on a proper schedule should gain approximately 50–100g per week without any supplemental feeding.
- If your boa appears under-conditioned (visible spine, concave lateral body profile), consult an exotic veterinarian rather than increasing frequency — there may be a health issue driving the weight loss.
Sub-Adults (18 Months – 4 Years)
At this stage, male and female boas begin to diverge significantly in body size. Females grow considerably faster and larger. The feeding program must be differentiated by sex.
Sub-Adult Males (18 Months – 4 Years)
| Age | Approximate Length | Approximate Weight | Recommended Prey | Prey Weight | Frequency |
|---|---|---|---|---|---|
| 18–24 months | 4.5–5.5 feet | 2.0–3.5kg | Small to Medium Rat | 100–150g | Every 14–21 days |
| 2–3 years | 5.5–6.5 feet | 3.5–5.0kg | Medium Rat | 150–200g | Every 21 days |
| 3–4 years | 6.0–7.0 feet | 4.0–6.0kg | Medium to Large Rat | 200–300g | Every 21–28 days |
Sub-Adult Females (18 Months – 4 Years)
| Age | Approximate Length | Approximate Weight | Recommended Prey | Prey Weight | Frequency |
|---|---|---|---|---|---|
| 18–24 months | 5.0–6.5 feet | 2.5–4.5kg | Medium Rat | 150–200g | Every 14–21 days |
| 2–3 years | 6.5–8.0 feet | 4.5–7.0kg | Large Rat | 250–350g | Every 21 days |
| 3–4 years | 7.5–9.0 feet | 6.0–9.0kg | Large Rat | 300–450g | Every 21–28 days |
Important: These charts are based on the boa receiving prey equal to approximately 5–10% of their body weight per feeding. Weigh your snake at least monthly and adjust prey size proportionally. Do not increase prey size faster than the snake's body weight increases.
Adult Boas (4+ Years)
At this stage, a correctly managed boa should be approaching or at its mature adult size. The difference between male and female is now pronounced.
Adult Male Boas (4+ Years)
| Phase | Approximate Length | Approximate Weight | Recommended Prey | Prey Weight | Frequency |
|---|---|---|---|---|---|
| Non-breeding season | 5.5–7.5 feet | 4–8kg | Medium Rat | 150–250g | Every 3–4 weeks |
| Breeding season (Oct–Mar) | Same | Same | May refuse | — | Offer every 3–4 weeks; accept refusal |
| Post-breeding recovery | Same | Same | Medium Rat | 150–250g | Every 2–3 weeks until weight restored |
Adult Female Boas (4+ Years)
| Phase | Approximate Length | Approximate Weight | Recommended Prey | Prey Weight | Frequency |
|---|---|---|---|---|---|
| Non-reproductive | 7–11 feet | 7–15kg | Large Rat | 350–500g | Every 3–4 weeks |
| Pre-breeding conditioning | Same | Same | Large Rat + 20% | 450–600g | Every 2–3 weeks for 2 months |
| Gravid (pregnant) | Same | Increasing | Large Rat | 400–500g | Every 2–3 weeks |
| Post-birth recovery | Same | Significantly reduced | Large Rat | 350–450g | Every 2 weeks until weight restored |
For rat sizing reference in grams, always cross-reference with our frozen rat size chart and our detailed rat size chart by weight in grams.
3. The Power Feeding Problem: A Detailed Look
Power feeding — intentionally feeding boas more frequently and with larger prey than their biology requires — is widespread in the boa community for one simple reason: it works, in the short term. A power-fed boa can reach adult size in 2–3 years instead of 5–7, and it will grow into an impressively large animal quickly.
The problem is what's happening inside.
Hepatic Lipidosis (Fatty Liver Disease)
When a boa receives more dietary fat and protein than its liver can metabolize at its natural pace, fat accumulates in hepatic cells. This is not immediately visible externally. A power-fed boa looks healthy — until it doesn't. By the time clinical signs of hepatic lipidosis appear (lethargy, loss of appetite, jaundice-like discoloration, ascites), the disease is already advanced. There is no effective treatment. A boa with advanced hepatic lipidosis typically dies within 6–18 months of diagnosis.
Cardiovascular Disease
Excess adipose tissue deposited around the heart and great vessels impairs cardiac function over time. Power-fed boas often show signs of cardiovascular compromise in their mid-teens — an age at which a correctly managed boa should still have 10–15 years of healthy life ahead.
Reproductive Failure
Obese female boas often have difficulty producing healthy litters. The excess internal fat competes with developing follicles and fetuses for abdominal space, leading to smaller litter sizes, dystocia, and reduced fertility.
Regurgitation
A digestive system being asked to process meals too frequently develops a higher regurgitation rate. If your boa is regurgitating regularly, this is a sign that the feeding frequency is too high. Implement the 14-day rest protocol from our snake regurgitation guide and reduce both the prey size and the feeding frequency going forward.
4. Prey Type Progression for Boa Constrictors
Boa constrictors start on mice and transition to rats as they grow. Here is the progression that works best based on our 25 years of experience:
Phase 1: Mice (Hatchling to ~3–4 months)
Hopper and small adult mice are the appropriate starting point. They are small enough to be non-threatening to hatchling boas and large enough to provide meaningful nutrition. See our frozen mice size chart for exact sizing.
Phase 2: Mouse to Rat Transition (3–6 months)
Begin introducing rat pinkies or rat fuzzies. If the boa is reluctant to take rats, briefly rub the rat with a thawed mouse to transfer familiar scent. Most boas transition smoothly within 2–3 feeding sessions.
Phase 3: Rats as Staple (6 months onward)
Rats become the primary prey source and remain so for the lifetime of the boa. The nutritional profile of rats — higher protein density, appropriate fat levels — is better suited to the heavy-bodied python physiology than mice. Our complete frozen rat size chart provides the reference for this phase.
Phase 4: Rabbit Consideration (Very Large Adult Females, Optional)
Some keepers of very large adult female boas (10+ feet, 12+ kg) transition to rabbits for feeding efficiency — one large prey item is easier to manage than multiple large rats. This is strictly optional and not necessary for most boa constrictors in captivity.
5. Body Condition Scoring for Boa Constrictors
Monitoring body condition is as important as following the feeding chart. A snake that is gaining weight too rapidly on a conservative schedule may have an underlying metabolic issue. A snake that is losing weight on a full schedule needs veterinary attention.
Underweight (BCS 1–2)
- Signs: Visible spine, visible ribs, concave lateral profile, tail narrows sharply at base
- Action: Consult an exotic veterinarian immediately. Do not simply increase feeding — weight loss despite feeding may indicate parasites, infection, or organ failure.
Ideal (BCS 3)
- Signs: Rounded, full body profile. Spine not visible. Lateral sides gently slope. Tail tapers smoothly.
- Action: Maintain current feeding program. Weigh monthly to confirm stability.
Overweight (BCS 4)
- Signs: Body appears "blocky" from above. Skin folds visible on sides. Tail appears thick at base.
- Action: Reduce prey size by one category. Do not reduce frequency yet — it is better to feed a smaller prey item more regularly than to starve and then overfeed.
Obese (BCS 5)
- Signs: Pronounced lateral skin folds. Very thick, cylindrical tail. Skin visible between scales on sides.
- Action: Immediately consult an exotic veterinarian. Rapid weight loss in obese snakes can itself cause organ damage. Reduction must be managed carefully.
6. Temperature Requirements for Optimal Digestion
The feeding chart above is only effective if your boa's enclosure maintains the temperatures needed for digestion. Without adequate heat, even a perfectly sized prey item will be regurgitated or cause GI tract infection as it rots before the digestive enzymes can break it down.
Required temperature gradient for boa constrictors:
| Enclosure Zone | Day Temperature | Night Temperature |
|---|---|---|
| Warm side / basking | 88–92°F | 82–85°F |
| Ambient (mid-enclosure) | 82–86°F | 78–82°F |
| Cool side | 78–82°F | 75–78°F |
After feeding, your boa will spend 48–72 hours primarily on the warm side of the enclosure. This is normal digestion behavior. Do not disturb a boa that is digesting a meal. No handling, no enclosure maintenance, no interaction for at least 48 hours post-feeding.
Verify temperatures with a digital infrared temperature gun — do not rely on analog stick-on thermometers, which are notoriously inaccurate.
7. Dealing with Feeding Refusals
Even perfectly managed boas refuse food occasionally. Here is how to interpret and respond to refusals:
Seasonal Refusal (October–February)
Adult boas commonly refuse food during cooler months as their seasonal instincts to reduce activity kick in. This is normal behavior. Continue offering food every 3–4 weeks, but accept refusals without concern as long as the snake maintains healthy body condition.
Pre-Shed Refusal
A boa in pre-shed (eyes clouding to opaque blue, skin appearing dull) will almost always refuse food. Wait until after the shed is complete and offer food 5–7 days later.
Post-Handling Refusal
If you have handled your boa within 48 hours of a feeding attempt, the snake may refuse. Establish a firm rule: no handling within 48 hours before or after feeding.
Prey Size Refusal
If your boa strikes the prey but then releases it without constricting or swallowing, the prey is likely too large. Drop down one size category.
Persistent Refusal (4+ weeks without seasonal cause)
If your boa refuses for more than 4 weeks outside of breeding season, consult an exotic veterinarian to rule out illness, parasites (particularly cryptosporidiosis in heavy-bodied pythons), or respiratory infection.
8. Thawing Large Prey Items Correctly
Large rats, the staple prey for adult boas, require additional thawing time compared to smaller mice. Follow this extended protocol:
-
Refrigerator thaw (24–36 hours): Large prey items require longer to thaw completely in the refrigerator. Move from freezer to fridge the day before, ideally 24–36 hours in advance.
-
Warm water bath (20–30 minutes): A large rat requires a longer water bath. Use 100–105°F water and maintain temperature by adding warm water as needed. For items over 300g, a full 30 minutes may be needed.
-
Internal temperature verification: The core of a large prey item can remain cold even when the surface reads the correct temperature. After the water bath, squeeze the prey gently along its length — if the core feels noticeably cooler than the surface, return to the water bath for an additional 10 minutes.
-
Surface temperature target: 98–102°F as verified by an infrared temperature gun on the body surface.
See our complete thawing guide for the full protocol applicable to all prey sizes.
9. Buying Quality Frozen Feeders for Boa Constrictors
As boa constrictors grow, the feeder rodents you purchase become increasingly significant investments. A monthly supply of large rats for an adult boa represents a meaningful ongoing cost, which makes quality even more important — a failed delivery or spoiled batch cannot simply be dismissed.
What to look for in a boa feeder supplier:
- Flash-freezing at -18°C or colder immediately after euthanasia — critical for preserving nutritional quality and scent
- Individual vacuum or sealed packaging — prevents freezer burn during transit and storage
- Reliable large rat availability — some suppliers run low on large sizes; choose one with consistent stock
- Dry ice shipping — particularly important in summer months when ambient temperatures can compromise the cold chain
For our complete analysis of suppliers, see our where to buy frozen mice and rats guide.
Frequently Asked Questions
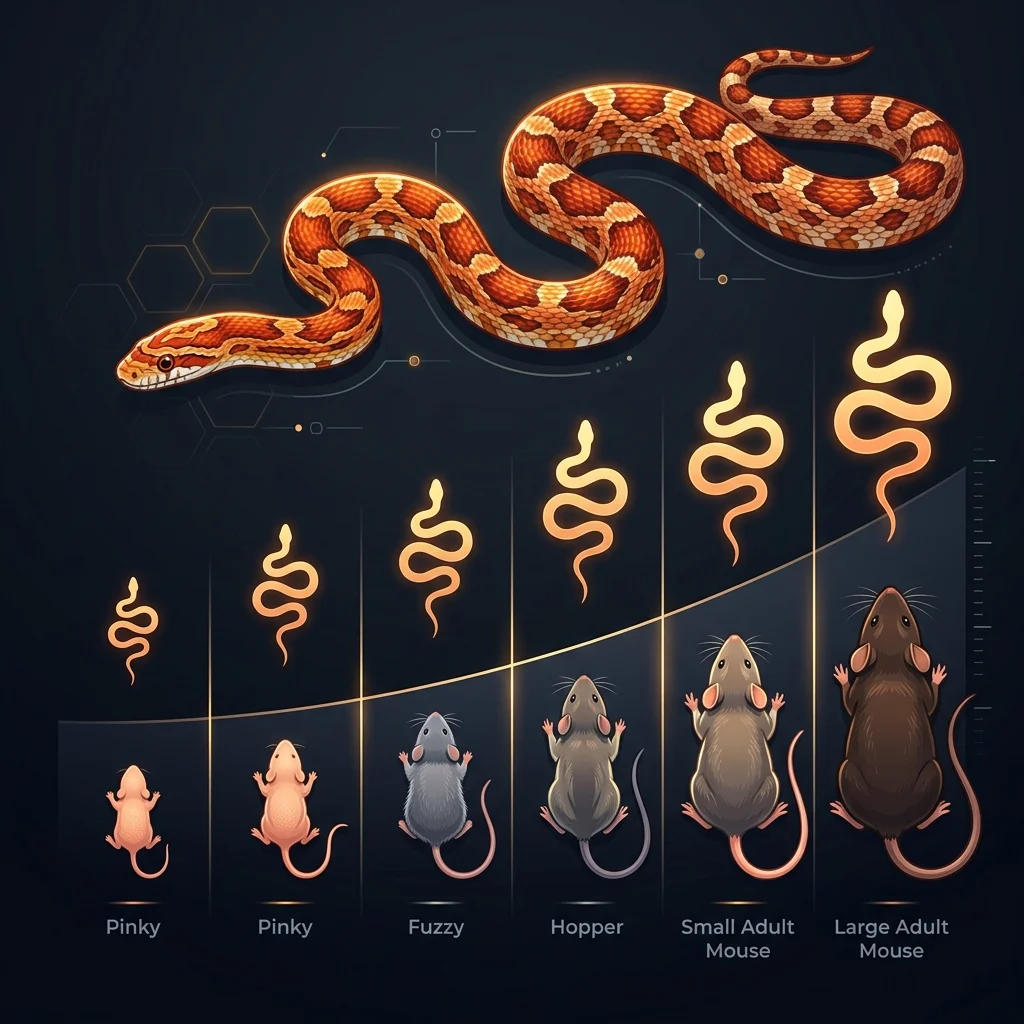
Q: How big should a boa's prey item be? A: Equal to the diameter of the widest part of the boa's body — no more than 1.5x that diameter. Use our weight-based chart above for a more precise guide.
Q: My boa is growing faster than the chart suggests. Should I feed more? A: No. If your boa is growing faster than expected on the correct schedule, check that your prey sizing is accurate. A prey item that is consistently at the upper limit of the recommended weight range will support faster growth without increasing feeding frequency.
Q: Can I feed my boa live prey? A: We strongly recommend against it. Adult boas are powerful enough to subdue live prey, but live prey can still inflict serious injury — eye wounds, facial lacerations, and throat injuries from defensive bites. A frozen-thawed rat of the same size poses zero physical risk. See our live vs. frozen feeding comparison for a full analysis.
Q: My adult boa hasn't eaten in 6 weeks. What do I do? A: For adult boas, 6 weeks without eating outside of breeding season warrants a check of husbandry (temperatures, humidity, hide quality) and a veterinary consultation if no husbandry issues are found. Many adult boas fast for 4–6 weeks seasonally, but persistent refusal beyond this should be investigated.
Conclusion
The boa constrictor feeding chart in this guide is designed to support a 25–30 year lifespan for your animal. By following weight-based prey sizing, maintaining conservative feeding intervals, monitoring body condition monthly, and using only high-quality frozen-thawed prey, you give your boa the best possible foundation for a long, healthy life.
For more expert resources, explore our complete reptile feeding guides, and visit our home page to learn more about Loxahatchee Rodents. For more specific troubleshooting, see our companion articles on snake regurgitation and how often to feed your snake.
Written by Bill Galloway, Former Assistant Curator at Palm Beach Zoo and co-founder of Loxahatchee Rodents.